



How to Grow Cool Season Vegetables from Seeds and Starts

It's Brie the Plant Lady here. The “dog days” are winding down and while the current temperatures are making me sweat, I am dreaming of the crisp autumn days and delicious fall harvests ahead. It can feel counterintuitive to be growing broccoli in warm weather, but late summer is the time to get your cool season crops planted!
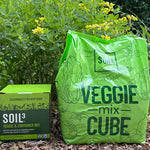
Broccoli starts that I purchased from Home Depot are thriving along with barley and lettuce started from seed. Plus, that's broccoli growing in my Soil³ Mini Cube!

Getting Started for Fall
So, what do you need to know to get ready for fall planting? It depends on whether you’re growing from seed or planning to buy starts. “Starts” are young plants that someone else has grown from seed and are ready to transplant into your garden. Garden centers typically carry tried-and-true varieties of starts that are well suited for home gardens. Seeds, on the other hand, give you many more choices, including unique and unusual varieties you will not find at your local store. Consider growing plants both ways to get the best of both worlds!
Let’s start with seed instructions.
Fall Seed Starting
Don’t hesitate! If you want to have fall harvests before frost hits, you need to get your seed started early. (See my Fall Veggie Calendar below.) I actually start in mid-July and try to sow a small batch of seed every two weeks to ensure I have plenty of crops to rotate into my beds in the coming months. That is a key point for fall crops, because you don’t want to have 50 heads of broccoli ripe at once. Instead sow 10 at a time so you can stagger your harvests.
Here is a quick seed sowing tutorial:
The process for seed starting is simple, and it works the same for pretty much all your crops:
- Gather trays and liners: I just recycle the ones I have purchased plants in over the years.
- Clean your trays: If you are recycling like me, it is often recommended that you soak the trays in a light bleach solution to ensure the trays are clean. I used to do that but in recent years I just lay the cell packs out and rinse thoroughly using a hose.
- Use Soil³ as your growing medium: Fill the pots with Soil³ - no need to mix it. Use your hand to evenly distribute the soil. Once you have the tray filled, gently tap the sides or bottom to ensure the soil is settled. Plant right in Soil³!
- Make a hole: Using a pencil or stick, dibble a small hole into the center of each cell.
- Drop the seed into the hole: Try to only put one or two seeds into each, as this will reduce your need to thin the seedlings out. Cover the seeds and very gently press the top of the soil to ensure seed-to-soil contact.
- Place in a partly shaded area with easy access to water: I store seedlings in my greenhouse that has 50% shade cloth covering it or place trays under my deck.
- Finally, water evenly and keep them moist - not wet! 💦
My seed trays planted, labelled, and ready to grow! I sow seeds directly in Soil³.

Seeds need moisture to germinate but there is a delicate balance between too much and too little. This means check them daily. My approach is to pick the tray up and if it is heavy, you can skip watering. If it feels light, give it a drink. Generally, I grow on the dry side - it is easier to bring a plant back to life from being dry, versus reviving something that has been overwatered.
When the Seeds Germinate
Keep Watering!
Once the seed germinates the real fun begins. As the plant develops it will need more water so keep on watering and remember they should be moist - not wet.
Apply Bt to Brassicas
As the fall veggie seedlings grow, start to apply Bacillus thuringiensis (Bt) to avoid cabbage worm damage. Bt is a bacterium that has been used since the 1920’s and is often applied in organic farming. It naturally produces a toxin that is fatal to certain herbivorous insects including the cabbage worm which can decimate your fall Brassicaceae crops such as broccoli, Brussels sprouts, cabbage, cauliflower, and kale.
Bt is available as powder or liquid. Powdered is easy to apply but not as easy to find in garden centers. Liquid Bt is applied with a sprayer and usually needs to be mixed with water. Please carefully read the labels for directions. Be sure to purchase a sprayer that you dedicate to use only for Bt or other organic products (don't also use the sprayer for herbicides). Liquid Bt is available at most garden centers and big box stores.
I start treating my Brassica seedlings, like these broccoli, with powdered Bacillus thuringiensis (Bt) shortly after they germinate.

Depending on rain, you will need to apply Bt on a regular basis, because the fall cabbage worms are voracious, and they can eat your crop to nothing overnight - literally! It happened to me AGAIN this year.
The good news is not all your fall veggies are susceptible to being devoured by cabbage worms. As their name indicates, they stick to plants in the cabbage family. Arugula, beets, lettuce, and spinach are just a few of the cool season crops you can plant without worry.
They got me again! Cabbage worm damage on some of my transplanted seedlings.

Fall Transplanting
Whether you are growing your own seedlings or buying starts from a garden center, you want to make sure the plants are large enough to withstand normal garden conditions before you transplant them. My rule of thumb is they must be fully rooted, meaning no soil breaks off when I take them out of the pot.
Here is a quick transplanting tutorial:
The advantage of transplanting over direct seeding into the ground is that you have control over the spacing. Heading veggies, like broccoli, cabbage and cauliflower all benefit from being spaced 12-15” apart to allow for their wide development. In contrast, leafy greens such as arugula, kale, and mustard can be tossed onto a fresh layer of Soil³ organic compost to germinate directly in the ground.
Once you have your fall veggies planted, keep watch for cabbage worms, rabbits, deer, groundhogs, and watering needs. These baby plants will need more care, especially in early fall when they are not fully established, and the temperatures are still over 80°F on a regular basis. I also find myself watering a lot more often during September-October to compensate for dry spells and help keep the soil cooler, to trick the plants into growing despite the climate.
Heading veggies, like broccoli, cabbage, and cauliflower all benefit from being spaced 12-15” apart to allow for their wide development.

Fall Veggie Calendar for the Southeast
For reference, I have this handy cool season calendar to help guide you through the when, what, and how of planting for fall and winter!

| Plant Name | Seed Date | Transplant Date | Harvest Date |
|---|---|---|---|
| Arugula | August - March | October - March | October - May |
| Barley | October - November | November - January | June |
| Broccoli | August - March | October - March | October - May |
| Cabbage | August - March | October - March | October - May |
| Carrots | August - March | Direct Seed (do not transplant) | May - September |
| Cauliflower | August - March | October - March | October - May |
| Chard | August - March | October - March | October - May |
| Cilantro | August - March | Direct Seed (do not transplant) | March - June |
| Garlic | Directly plant cloves | September - December |
June |
| Kale | August - March | October - March | October - May |
| Kohlrabi | August - March | October - March | October - May |
| Lettuce | August - March | October - March | October - May |
| Mustard | August - March | October - March | October - May |
| Oats | October - November | November - January | June |
| Peas | August - March | October - March | April - May |
| Potatoes | Directly plant tubers | February - March | June |
| Radish | August - March | October - March | October - May |
| Spinach | August - March | October - March | October - May |
| Wheat | October - November | November - January | June |
When to Harvest
This is always a difficult question to answer because there are so many variables. Some factors include planting date, climate conditions, and the specific variety that you are growing. Take for example heading broccoli versus sprouting broccoli. It takes longer for the plant to establish a large head vs smaller side shoots that continuously initiate. Bonnie plants has a great online resource to help you identify when your crops are ready to harvest.
Want to Learn More?
Visit my Brie The Plant Lady YouTube channel where I share loads of information and hands-on tips for cool season vegetables and tons of other topics too!
Wishing you all the best. Stay happy, healthy and keep on growing!
Brie the Plant Lady


